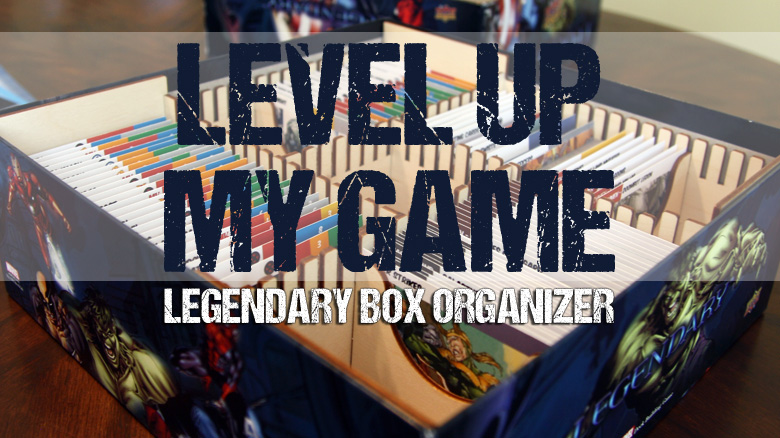
Welcome to the first article in our new series called Level Up My Game. In these articles, we’re going to dive into the world of “pimping out” your games (for lack of a better term). We’ll talk about component upgrades, storage solutions, game modifications and other ways to improve upon the games you love. There are a number of 3rd party companies out there providing new ways to improve your tabletop experience and we are planning on reviewing many of them for you. In addition, we’ll also be diving into some home-brew solutions as well.
As a final note, long time readers on our site probably know that we usually end reviews with a rating of some kind. I won’t be doing that for Level Up My Game as everything I write about will at least be something worth trying. If it’s crappy, it won’t be here. So sit back, relax and enjoy some new ways to “Level Up” your board games.

For our inaugural article in Level Up Your Game, we are going to be talking about game storage solutions. Specifically, we are going to be diving into a better way to store the Marvel Legendary Deck Building Game. If you haven’t played it yet, I reviewed Legendary a while ago (review here), and loved it. Since that reviews was posted, I’ve ended up obtaining each and every expansion for this game (Dark City, Fantastic Four, Paint the Town Red). As someone with a rather large game collection, I tend to try and condense all expansions into the base game box whenever possible. It reduces the clutter on my shelves and makes transportation much easier. By the time I incorporated the Paint the Town expansion for Legendary, I had just about run out of room in the box with the default plastic try. So it was time to hunt for a new solution.
The first and easiest option would be to just place the cards all in a new box, such as a long box for baseball cards. However, there was no way that was going to happen. I almost always want to keep games in the original box. It helps me find a game quickly and as a designer, I really appreciate the artwork. That’s also why I almost always use transparent sleeves. So my only other option was a new insert. If you are handy, you can make a new insert yourself out of foam core (there are probably plans floating around the interwebs for that), but I don’t really have time for that. While I am pretty handy, free time is not something I have an abundance of right now.
So it was off to Google and the pipes on the internet to look for an easy solution. Eventually my hunt led me to a wooden box organizer produced by The Broken Token. The photos looked like it would fit the bill and only minimal assembly required. Flipping through some photos, it looked like it would fit in the game box; hold all my sleeved cards and also the rule books. As an added bonus, it promised to have plenty of room for future expansions. Requirements = checked.
The box organizer arrived fairly quickly and came as 4 wooden sheets and instructions inside a plastic bag. I glanced over the instructions and went to work. Having never assembled a wooden organizer before, I wasn’t sure what I was in for but figured it can’t be that hard. I gathered the recommended tools (rubber mallet and an X-Acto Knife) and got to work.
Because I’m so nice to you guys, I decide to record the process of putting together the organizer so you can see how hard/easy it is:
Over all it took about 30 minutes to assemble. It probably would have gone quicker if I had not screwed up in the middle and needed to start over somewhat. Pay attention to the directions kids. The assembly for the most part was pretty intuitive. Getting all the pieces together was a bit tougher than I thought it would be and had a few pieces pop out at times. But once I got it all together, I don’t think it was ever coming apart unless I wanted it too. I’d highly recommend having the rubber mallet on hand as it was very useful to hammer some of the tight connecters into place.
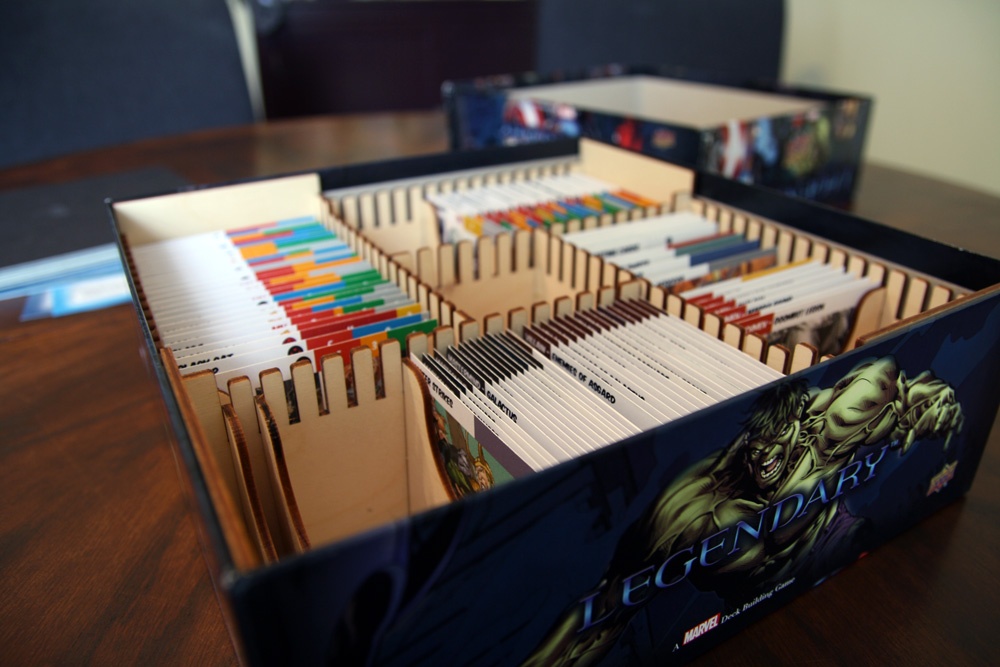
Once assembled, it felt very sturdy and fit snugly into the box. There are a number of wooden dividers to suite your preferences (although I do wish it came with a couple more) and, as you can see, all the cards fit in with plenty of room to grow. I also tested out how secure of a fit the game was by flipping over the box a few times once everything was all inside. I’m happy to report no cards fell out and this box organizer is a great solution.
It does add a bit of weight to the game box as you might expect, but if you are looking for a way to store these overflowing cards, then I can happily recommend the Legendary Box Organizer from The Broken Token. Overall this was a great solution that only required minimal effort on my part.
If you are interested in getting one for yourself, you can buy it for $24.99
Well that about wraps things up for this edition of Level Up My Game. Hope to see you back here next time. Do you have your own solution for Legendary? Let us know in the comments below.










I love it! Definitely bookmarking the broken token those look awesome. Games come in 23 stages for me Stage 1: Learning the game , Stage 2: PLaying the game, Stage 3: Organizing for quicker setup and teardown.
Can’t wait to see what stages 4-23 are. 🙂
4- 23 are me reflecting on the fact that my fingers are really stupid but unfortunately necessary curse their sudden but inevitable betrayal.
This is on my list of things to get. I ran into the same problem with Paint The Town Red. I’ve also run out of cardboard dividers, so I need to get some more of those.
A good X-Wing Minis solution would be awesome. I’ve seen some of the foam storage options, but a write up on how to put together an entire solution for the minis and components, provide some room for expansion, and carry it all would be great (FYI I am fairly new to gaming so maybe this is a terrible idea for an article).
That’s actually a good idea Paul. I’ll put it on the list for a future article.
I get the idea of liking to keep things in the original box, but for X-wing minis, I came across a piece on BGG for a storage method for x-wing using a Stanley 014725 25-Removable Compartment Professional Organizer. The run at $12.80 on Amazon. I went with two of them: one for the components and one for the minis, and it worked out really well.
Here’s the BGG thread, complete with pictures of the case:
http://boardgamegeek.com/thread/943758/my-non-plano-storage-solution-now-storing-epic-shi
Well, I think you should check out the custom set of X-Wing trays solution for the “Mantis Model Storage Case” made by Mantis Creations, which is finishing on Kickstarter in half an hour’s time as I type this. It’s much cheaper than buying one of those truly expensive foam bags from Battlefoam and other competitors, but still offers the same type of foam.
Just got the 7 Wonders box!
Your dividers look nice what kind of card stock did you use?
I don’t remember off the top of my head, just a pack of regular card stock I got at officemax.
They look better than mine. Like your card kinda has a shiny tint to it.
Any chance you could post your dividers template? They are the best ones I’ve seen.
Would also love the dividers template!
Still holding out for your dividers template
Sorry, I made them a long time ago. Not sure I still have the files.
I was wondering where you got the custom dividers created/made and if you used the original marvel legendary dividers and covered them up or went to a print shop for them! I also bought the broken token organizer! Also Love It!
It’s been a long time, but those might have been the dividers I made myself. Either that or I got the files from BGG. I’ve done both in the past. 🙂
As for printing, I just print them myself on heavy card stock in a laser printer. Works great.